As a small business owner, you are probably familiar with QuickBooks Online, the intelligent accounting software designed to manage everything from tax filings to payroll. But if you’re just getting started with QuickBooks, or if you’ve recently transitioned from the QuickBooks desktop version, you might be seeking guidance on how to navigate this tool.
Fear not – this straightforward guide has got you covered. It offers all the support a new QuickBooks user requires. Eager to learn about how using QuickBooks Online works? Let’s dive in with ten simple steps.
Welcome to the QuickBooks Online Dashboard
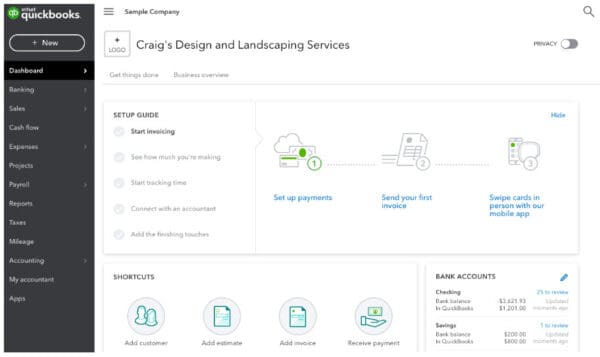
The initial stage in mastering QuickBooks Online for your business involves acquainting yourself with the dashboard.
Upon logging into your QuickBooks online account, the dashboard is the first thing yoll encounter. It serves as your central navigation hub, giving you access to all essential features as a QuickBooks user. Take some time to explore various menus on the dashboard, familiarising yourself with the locations of different tools and functions.
Add your company information
After your first QuickBooks login, you should set up your company information and preferences. From your dashboard, click on the gear icon and select ‘account and settings’ then select the ‘company’ tab. From here, you can add information about your company like:
- Company name
- Company type
- Contact information
- Address
- Company logo
Pick your financial preferences
While yore in the process of inputting your company’s information, you can also fine-tune your financial settings in this section of your QuickBooks Online account using the sales, expenses, and advanced tabs. Modify parameters such as your credit card payments, invoice automation, VAT details, and your company’s financial year-end date to ensure all the data is precise for your reports.
Import your business data
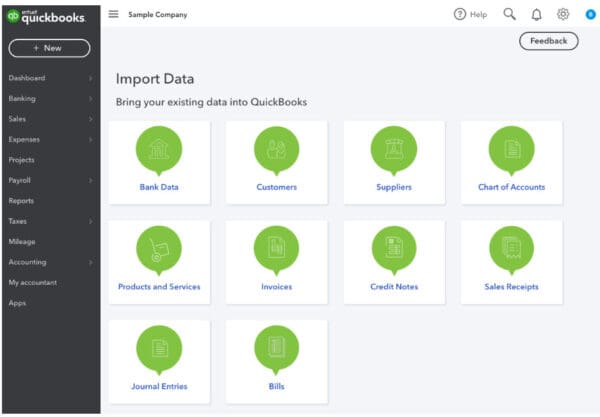
Automatically importing your business data to your QuickBooks Online application is a straightforward process, sparing you the need to begin from zero. Is possible to import data like your bank transactions, Chart of Accounts, supplier bills, employees, budgets, and customer or vendor information.
QuickBooks Online provides a variety of methods for data importation, allowing you to select the one that best fits your business needs. Some of the different approaches you can employ include:
- MS Excel files
- CSV files
- Intuit Interchange Format (IIF) (that’s QuickBook’s proprietary text file)
- Web Connect file
Customize your Chart of Accounts
The Chart of Accounts refers to the variety of categories in QuickBooks that are used to classify monetary transactions for your company’s financial records. QuickBooks Online comes pre-set with five categories: income, expenses, assets, liabilities, and equity. Most business users keep these default settings in QuickBooks, but you might find it beneficial to tailor these categories according to your specific needs. You may want to rename these categories or even establish an additional category that does not fall under the existing five.
To achieve this, navigate to ‘Accounting’ on the dashboard, then click on ‘Chart of Account. Click on ‘New’, then select ‘Expens or ‘Other Expens under ‘Account Typ. Next, choose a ‘Detail Typ and input the name of your new expense category, adding a description for clarity.
Wondering how to export your Chart of Accounts in QuickBooks Online? On your Chart of Accounts screen, click the ‘Run Repor button. Yoll see four options: print, email, export, and settings. Simply pick the appropriate one to export the data to an Excel spreadsheet or a PDF file.
Connect your bank and credit cards
At this juncture, you can link your QuickBooks Online account with your bank accounts and credit cards. This allows QuickBooks to automatically retrieve and categorize your past transactions, saving you the hassle of manually entering these details.
Go to ‘Bank Account on your dashboard and select ‘Connect accoun, then locate your bank and log in with the same credentials you use for your online banking. After the connection is established, yoll be able to view all of the accounts associated with this bank. Choose your business account, and then specify the transactions you want to import into your QuickBooks account. Most banks will display transactions dating back 90 days, while some offer a historical view of up to 24 months.
Once yove chosen the appropriate transactions, QuickBooks will download them automatically. After the transactions have been downloaded, all thas left for you to do is validate their categorization.
Add more users
Do you wish to delegate tasks by adding more users to your account? QuickBooks for small businesses allows you to add additional users, from your sales manager to your bookkeeper.
You can customize the permissions for each user, enabling them to perform particular tasks. However, your subscription level dictates the number of users you can add. If you encounter a user limit, you might want to contemplate upgrading to a higher level.
To invite a new user, simply go to ‘Setting from your dashboard, then to ‘Manage user. Select ‘Add use and choose the type of user you wish to create. The options available include:
- Primary admin: The main user with access to every area of the QuickBooks account. By default, this is the person who set up the account.
- Company admin: This user also has full access, and can do everything the primary admin can do, other than add, remove or edit the primary admin.
- Standard user: You can set different access levels for standard users, allowing them to work with, for example, expenses, sales or suppliers. They can add users, enter timesheet data, manage subscriptions and update company information – note that the QuickBooks Online app doesn’t currently support this type of user.
- Reports user: Available in QuickBooks Online Plus, this type of user can see all reports apart from the Audit log showing your payroll information.
- Time tracking only user: If you need employees or suppliers to log their time but don’t want to give them access to reports, you can add them as a time tracking only user.
Set up payroll
Curious about how QuickBooks payroll functions? Integrating your payroll with QuickBooks consolidates everything into one centralized location. You can categorize your payroll expenses, allowing you to quickly identify the portion of your monthly expenditure allocated to staff salaries. Plus, thers no need to maintain another separate system.
Is now time to set it up. Navigate to ‘Payroll Setting and then ‘Setup Overview’. In this section, you can input crucial details for your QuickBooks Payroll, including:
- Pay policies: this includes your payment schedules and vacation policies
- Tax setup: Essential to ensure that tax payments are processed properly
- Deductions: If you have standard deductions for all employees, like health insurance or retirement plans, you can add them here
- Preferences: This covers things like accounting and cheque printing
After inputting this information, go to ‘Accounting’ from the setup overview screen, then select ‘Company and Accoun. Decide on the account that will be utilized to track payroll expenses.
To incorporate employees into your payroll, navigate to ‘Employee from your dashboard. Here, you can enter your employee details. Bear in mind that all employees will be subject to the standard pay policies and deductions yove already established, but you also have the option to add these when adding employees. Yoll be guided through the process, as shown in the video below, to set up their tax information, salary details, and other specifics such as their pay schedule.
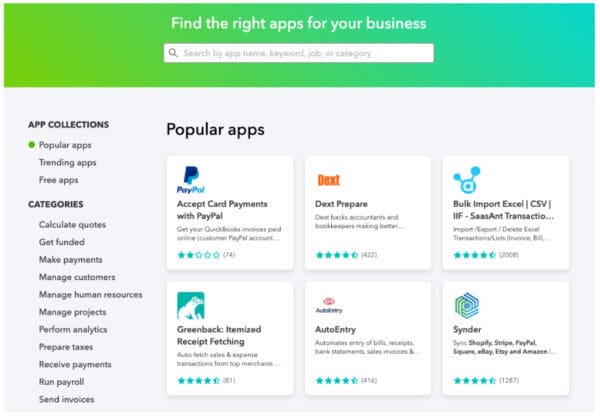
Connect your apps
Reconcile regularly
QuickBooks Online is a time and effort saver, but it performs optimally when regularly updated. You should reconcile your accounts frequently (QuickBooks suggests monthly) to ensure your records align with your bank and credit card statements. Since Float draws real-time data from QuickBooks Online, frequent reconciliation guarantees your cash flow forecast remains precise.
Allocating a few minutes daily, weekly, or monthly for account reconciliation can prevent potential complications in the future. Hers how to proceed:
- From the home screen, click on the gear icon and then ‘Reconcile’
- Choose the bank account you want to reconcile
- Enter your ending balance and end date from your statement
- Click on ‘Start Reconciling’ – this will pull through the transactions for the specified period
- Check the transactions in QuickBooks against those on your bank statement
- In QuickBooks, tick the correct transactions
- The difference amount should be zero – this means that the transactions match
- If there is a difference, check that the number of transactions is the same on both sources. If there are missing transactions in QuickBooks, you can manually add these in.
- If the issue is with the date of transactions, just click on the date and change it to the correct one as per your bank statement
- If neither of these things solves the issue, check that the amount of each transaction is correct in QuickBooks
- Click on ‘Finish Now’
Summary
Eager to give QuickBooks Online a try? One of the most effective ways to become acquainted is by taking it for a test drive. Start here.
QuickBooks is user-friendly for beginners and perfect for small businesses looking to save time and money while managing their expenditures and revenue. Moreover, integrating it with Float guarantees your forecast remains current, providing a live snapshot of your cash flow situation.
Meet with a QuickBooks service expert today!
Schedule a complimentary QuickBooks service consultation to find out the recurring accounting services to help your business run at its best.

